Nebula Office is a one-stop destination for all your professional needs. It is a multi-site program for documents and presentations. Nebula Office is very much similar to MS Office. It has tools like Writer, Calc, Impress. These tools help you to create all types of documents. You can also edit other documents from Google and MS Office documents.
The functions in the Nebula Office are also very simple. It is a great way to begin office and household businesses. In this article, we will know more about Impress.
What is Impress?
An impress is a presentation tool. Impress is a PowerPoint and Slideshow alternative to Microsoft PowerPoint. You can do impressive slideshows with this tool. It has important elements like text, tables, lists, bullets, etc.
A number of graphics like drawings, clip art, and photographs are available. There are spell checker and thesaurus for help. It also includes a wide range of background styles and text styles. Knowing these functions are necessary.
So, let us know more about adding text in Impress. We will also know how to format text in Impress.
Adding text in Impress
All the text that you wish to display in Impress is put in text boxes. You can add, delete, and edit these text boxes. After inserting text, you can format them too.
Adding text boxes to slide
- Go to the Layout section and add the desired layout.
- The text box among the layouts is AutoLayout.
- To enter text in this, select Normal View.
- Click on Click to add text.
- Type the text you want to add in AutoLayout.
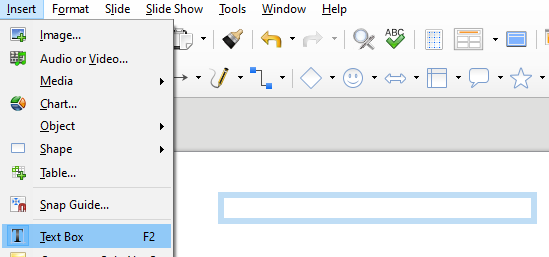
Another way to create text boxes is present below.
- You can create a text box using the horizontal/vertical text tool.
- This is in the Drawing toolbar or Text toolbar.
- Keep Normal View selected.
- Click and drag on the slide to adjust your text box.
- Release when you are done.
- Type your text and to deselect click outside the box.
To delete the text box:
- Click the text to display the border of the text box.
- Click on the border to display selection handles.
- Now press delete.
Formatting text
Text formatting is essential to give the presentation consistency. This also allows you to choose elements without making it a distraction. As you add the text, you can control the style. For formatting, you must consider character attributes, paragraph attributes, and list attributes.
Here are the chronological steps to follow to format text.
Selection of text
Formatting is applicable only when the text is selected.
- Click on the text once.
- Select the corner of the text box to the selection handle.
- This will apply formatting to all text.
- For a part of the text, select only the required text.
Applying style to text
There are two types of styles. They are presentation and graphics style. We will see about presentation style as it is for text.
- Go to Styles and select the Format.
- The formatting dialog displays.
- Now, select Styles and Formatting.
- Select the Presentation styles icon.
- Right-click and select modify.
- Now another dialog box is displayed.
- You can modify according to your requirement.
Updating style
After modifying, you must update it.
- Select the text with the format you applied.
- Go to the style and formatting dialog.
- Select the style that you like to update.
- Click the update icon.
- Now the format you did is updated as a style.
This is how we format a text. We can also format a character or a paragraph.
Pasting text
When you paste the text, it may not display formatting options. Use Ctrl+V to paste. Select that text and go to Format > Default Formatting. Now apply the necessary formatting.
Formatting a character
Here we will know how to format a character.
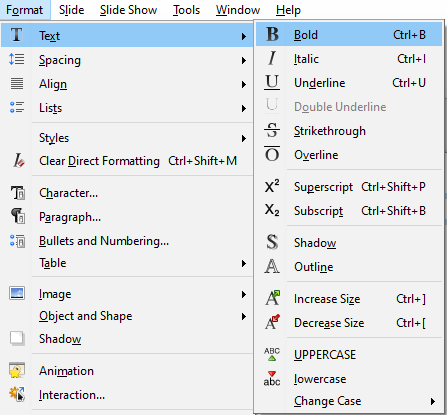
- Go to Format and select Character.
- In the open character dialog box, click the character icon.
- You can select the kind of font, font effects, and position.
- Press OK to save the changes.
Otherwise, go to properties and click more options on the sidebar. On the top right, press character. This opens the character dialog box.
Formatting a paragraph
You can also format a paragraph. Here is a way to do it.
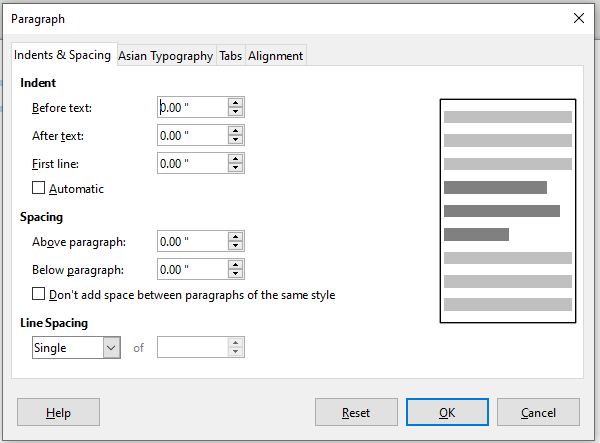
- Go to Format and click Paragraph.
- You can also click the Paragraph icon on the menu bar.
- Now the paragraph dialog box opens.
- You can change the indents and spacing, alignment, and tabs.
- After modifying, click OK to format a paragraph.
Note: If you cannot see Formatting toolbar, go to View > Toolbars > Text formatting. This will display the text, character, and paragraph icons on the menu bar.