Having good presentation skills is important in classrooms or workplaces where you can share your ideas and thoughts with an audience. The key aspect that depends on a good presentation is how you create it.
Change to Nebula Office Impress
Nebula Office is an established office suite for Windows users. It is a well-equipped office suite that is highly compatible with a wide range of software including Microsoft Office, Google Sheets, Google slides, Google docs, etc.
Are you looking for an adept platform where you can create effective and impactful PowerPoint presentations? Well, Nebula Office Impress is our suggestion. It is a PowerPoint Slideshow, which is an alternative to the Microsoft PowerPoint. Creating and formatting presentations or slideshows in Nebula Office Impress is very easy.
Bulleted and numbered lists or points are an excellent way to organize information in your slide. It increases the readability and lets you communicate coherently to the readers. How to use the bulleted and numbered list? Can we control its appearance or format it? We have the answers for you.
How to Create Lists with Bullets and Numbers?
Creating a bulleted or numbered list majorly depends on the kind of text box you are using. However, the tools you use to handle the list as well as to make specifications in the appearance are the same for all.
One of the major text boxes Impress provides is the AutoLayout text box which the Impress creates automatically. The bulleted lists are available by default in it as the outline style. On the other hand, for normal or ordinary text boxes, you need to employ additional steps to make a bulleted list.
List Creation in AutoLayout Text Boxes
In Auto Layout text boxes, the available layouts in every text box are priorly in the format of the bulleted list. That is, creating bulleted lists in AutoLayout text boxes is simple with only fewer steps. And the steps are:
- Choose one slide design that has a text box. You can select the slide designs from the Layout pane and is well identifiable from the thumbnails.
- To start typing, press on the Click to add text present in the text box.
- Clicking enter gives a start to the new bullet line
- If you want to start a new line without any bullet or number, click shift, and enter together. The indentation will be the same for the new line as the previous line.
The bulleted list is created by default in the AutoLayout text boxes. For any sort of customization in the list appearance, for instance, changing from bulleted to numbered or vice versa go to the Bullets and Numbering dialog. You can use the tools Bullets or Number in the Sidebar Paragraph subsection as well.
You can also create a list in the AutoLayout tet box without bullet points. For that, select the Bullets On/Off icon available in the Text Formatting Toolbar or click the Bullets in the subsection Paragraph on the sidebar.
List Creation in Other Text Boxes
- To create bulleted on numbered lists in other text boxes, firstly put the cursor in the text box.
- Go to the Text Formatting toolbar, select the Bullets On/Off icon or choose the Bullets or Numbering from the Paragraph subsection on Sidebar.
- You can type the text now.
- To start a new bulleted line, click Enter.
- Using Enter lets you create a new line new bullet or numbering.
- If you wanna improve the indent level of the item, press Tab to decrease.
Steps to Change List Type
How to change the list type of the items in an entire list?
- First of all, select the border of the text box which will expose the selection handles. Or select the full list by highlighting the items in the text box.
- If it is about a single item in the list, get the cursor in the line by clicking anywhere on the list.
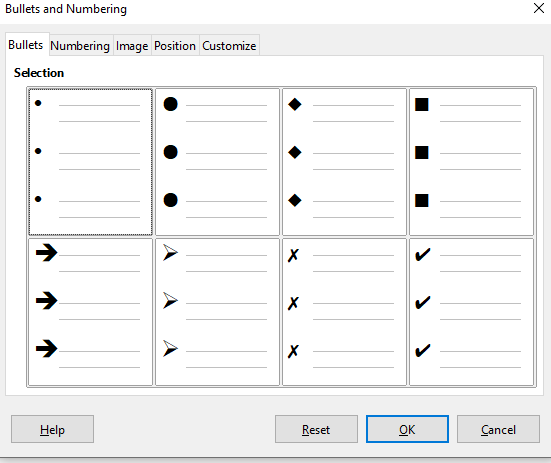
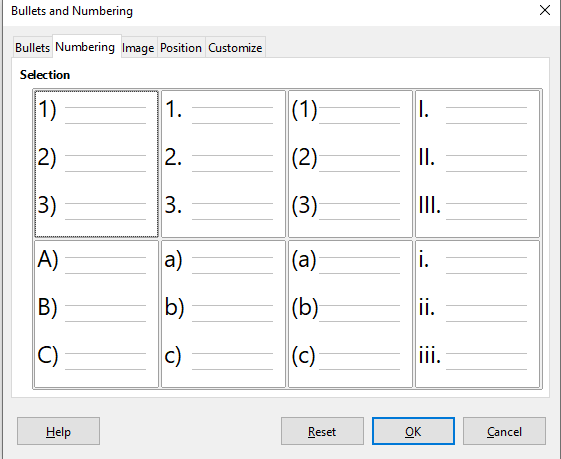
- Click Format and then Bullets and Numbering.
- From the dialog that opens, select bullet-style if you need a bulleted list or select numbered style if you need a numbering list.
Using Nebula Office Impress gives you a competitive advantage. Get ready for a corporate presentation experience with this article.