Impress, a program of Nebula Office, can help you in displaying the presentations in a customized manner.
In this article, we will talk about creating and modifying slide shows.
Fundamentals
The work is done mostly in Slide Sorter view available under View option in the Main menu or under the Workspace tabs.
The selection and sequence of slides
This includes advancing with slides and presenting them with different pointer options.
- Under the Slide Sorter view, go to Slide Show
- Select the options under Slide Show options
- Click OK to apply the changes.
Slide Show options
Range section
The slides for the slide show are included in the Range section.
All slides: includes all the slides apart from hidden ones. Slides are visible in the order of appearance in the files. To alter the sequence, either reorganize them or choose a custom slide.
From: makes the selected slide appear at the beginning of the slide show. This works especially when you want to skip the first slide and jump to your immediate content.
Custom Slide Show: displays the slides in a different order contrary to the previous sequence of a slide show.
Type section
In the Type section, select how the slides will be displayed.
Default: shows the slides in full screen with no program controls and ends it after the last slide.
Window: runs the slideshow under the Impress window and ends the show after the last slide.
Auto: resumes the slide show after the last slide. A Pause slide appears between the last and first slide. (Mention the time in the box; no pause slide appears and the show resumes when zero is entered). The Show Logo option displays the Nebula Office logo. Pressing the ESC key ends the slide show.
Options section
In the Options section, select the pointer controls.
Change Slides Manually or Change slides by clicking on the background. You can press the SPACE key on your keyboard to change.
Mouse pointer visible enables you to highlight the content using the pointer.
Mouse pointer as a pen helps to write over or draw on the slides while running the show. Changes made are temporary and unsaved.
Navigator visible makes the Navigator appear in the slide show
Animations allowed displays the frames of animated GIF files used. With this option disabled, only the first frame is on display.
Presentation always on top disables any other program window from appearing on top.
Multiple displays section
In the Multiple displays section,
This option enables you to select the display for running the slide show when connected to more than one display monitor. The primary display is the default setting. The presentation Monitor helps you to select the monitor for the slide show to run. Select all monitors to expand the window on all available monitors.
Hiding slides
You can also hide some of the unnecessary slides from the slide show.
- Select the slides from the Slides Pane or in Slide Sorter view.
To enable the Hide option,
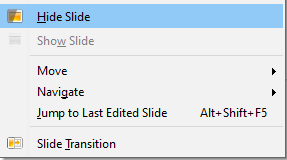
- Right-click on the slide and select Hide Slide from the drop-down menu; or select the icon on the Slide View You can also go to Slide Show > Hide Slide on the menu bar.
- Use the same process and select the Show Slide icon to view the slides again.
A hidden slide appears in the grayed section. However, that particular slide remains in the original file.

Customizing the sequence
To display the slides differently, you can also set up the Custom Slide show. You can define as many of them as you want. Hidden slides appear invisible in a custom slide show.
To create a Custom Slide show,
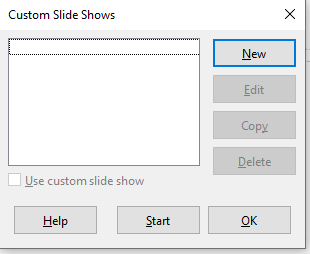
- Go to Slide Show and select Custom Slideshow from the menu. A dialog box will appear.
- Click New and type in the name of your custom slide show in the Name textbox.

>> Option includes the selected slides in the Existing slides list.
- Select a group of slides by holding the Shift key and selecting the first and last slide, or hold the Ctrl key and select the slides one by one to group them.
- Arrange the order and Click OK to apply the changes.
- To activate this option, select the Use Custom Slide Show.
- To Edit, Delete, or Copy the custom the show, select the options available under the Custom Slide Show dialog box.
- Click OK to save the changes.
Setting up a Slide Show with Impress is quite easy and this article will guide you in learning all the methods step by step.
