If you are using Nebula Media Player, all the effects of video and Audio are very useful. It is more useful if you are using Nebula Media Player only as a standalone player or music player. The advanced options like Compressor, Equalizer and other effects are best for you, which help you to make your audio produce a crunchy sound, which your ears like.
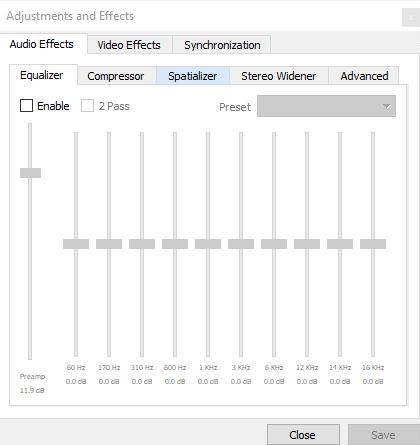
In Nebula Media player, you can use the equalizer to fix the audio sound, which you are playing by the variation in decibel. In addition, there is an option available called “2 pass.” In the advanced options, you will also see the compressor, which is built-in and used to lessen all the dynamic ranges between the most loud and most quiet sound. Additionally, you will see the spatializer for the entire audio settings.
If you want to go more deeper into all the audio files and filters, you will find some more features and options available under the advanced settings section. You can see all the filter settings, which are related to-
- Compressor
- Audio bar graph
- Equalizer
- Delay
- Gain
- Mono
- Headphone effect
- Remap
- Parametric equalizer
- Scaletempo
- Spatializer
- stereo enhancer
- And volume normalizer
All the above-advanced settings of Nebula Media Player will help you to do all types of audio settings. Hence, it is obvious to say that Nebula media player is kinda rockstar for all kind of audio setting needs. However, for normal users, these options are quite useless than for pro users.
Only a perfect sound, knowledgeable person will know how they can utilize all these options for the best results. Therefore, this article will help you out to find Nebula Media Players all built-in effect of the audio.
What are the most used sound effects and filters of Nebula player?
As described above, there are main three effects, which you can use for the audio filter while using Nebula media player.
To access this section, got the Tools>Effects and Filters alternatively you can use the shortcut key CTRL+E.
You will find the below options over there-
- Equalizer – Enable the equalizer, then you will be able to load the preset from the pre-built effects like Rock, Dance, Techno, etc. (Based on your taste of music). In addition, you can drag the sliders manually and then enable the “2 Pass” filter.
- Compressor – You can enable the compressor and utilize it similar to the equalizer.
- Spatializer – Similar to the equalizer, you can drag the slider and fit it according to your taste/preferences.
What are the Super-Basic effects of Audio and its settings?
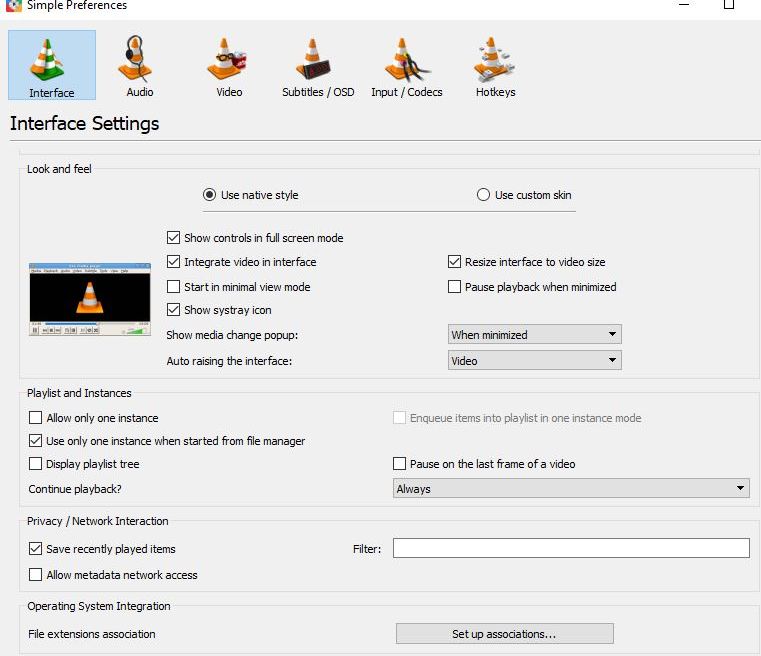
The super-basic audio effects are related to the sound/volume. You will find the settings here-
- Go to Tools>Preferences (CTRL+P).
- Now, switch to the Audio.
Here, you will find some options, which help you to do the followings-
- Enable the audio
- Reset the audio and level
- Enable/disable the time extending audio
- Normalize the volume to some specific levels
- Select the replay and gain mode
- Enable and disable Dolby, which surrounds your headphones and the speakers as well
- Select the audio visualization
- Set one of the preferred languages of the audio.
What are the advanced audio effects?
If you are not used to with the compressor and spatializer, it good of you to do not dig deeper into all the advanced audio effects. However, there are more music engineers, who would definitely go for this. Hence if you are keen to do the advanced audio effects settings, here are the steps for you-
- Go to the option Tools> references (CTRL+E).
- Next, click the entire radio button; it will reveal all the Advanced Preferences for you.
- Here, you will see the entire lot of advanced options, which are available in-group under the heading Audio section.
There are also some basic options available at the low-level audio. You can expand the filters and check out the features like-
- Parametric Equalizer
- Remap and Scaletempo
- Equalizer
- Compressor
- Spatializer
You will also find some more output modules, and under this, you will see the following options-
- DirectX
- File
- WaveOut settings.
- Speex resampler and SRC resampler.
- And Visualizations
We hope all the above options for the advanced audio effects and settings will help you out while using the nebula media player. Please comment below and let us know how the features assisted you with your needs. Happy reading.