A user can customize the toolbars in Impress by using various options. You can choose various icons and options to customize the toolbars. You can also customize the user interface by using the options available. In this article, we will tell you how to add new toolbars and customize them.
How to customize toolbars?
To customize the toolbars, follow these steps:
- Click on the view option.
- Click on the toolbars.
- Select the customize option.
- You can also right-click on the empty area present on the toolbar.
- Now, select the Customize toolbar option.
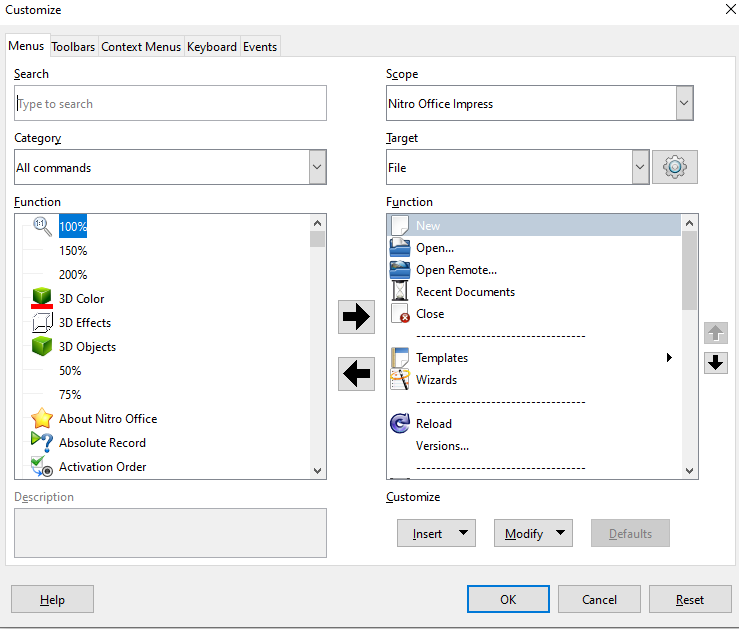
- This will open the customize dialog box.
- Keep the toolbars page open.
- From the save-in drop-down list choose whether you want to save this toolbar for the Impress or you want to keep it for a selected presentation.
- Open the Nebula Office Impress toolbars section.
- A toolbar drop-down list appears.
- Select the toolbar that you want to customize.
- Click on the toolbar option present on the right side.
- A drop-down list appears to select the options for customizing the toolbar.
- Select the option of your choice.
- For toolbars, the default setting is Icons Only.
- If you want to display and hide commands, you can select and deselect the checkboxes present in the Commands from the toolbar content section.
- You can also change the position of the commands.
- Select any command and click on the up and down arrows present on the right side.
- Click on Ok to save the changes.
- Close the dialog box.
How to create new toolbars?
To create a new toolbar follow these steps:
- Click on the view option.
- Click on the toolbars.
- Select the customize option.
- You can also right-click on the empty area present on the toolbar.
- Now, select the customize toolbar option.
- This will open the Customize dialog box.
- Keep the toolbars page open.
- Click on the new option.
- This will open the name dialog box.
- Type any name for the new toolbar.
- From the save-in drop-down list choose whether you want to save this toolbar for the Impress or you want to keep it for a selected document.
- Click on Ok.
- The new toolbar now appears on the list of toolbars in the customize dialog box.
- Add some commands to the new toolbar.
How to add commands to the toolbar?
To add commands to a new or an existing toolbar, follow these steps:
- Click on the view option.
- Click on the toolbars.
- Select the customize option.
- You can also right-click on the empty area present on the toolbar.
- Now, select the customize toolbar option.
- This will open the Customize dialog box.
- Keep the toolbars page open.
- From the toolbar drop-down list select the toolbars option.
- Click on the add option.
- This will open the add commands dialog box.
- Choose a category and command from the list.
- Click on the add option.
- After adding the commands, click on the close option.
- You can also change the position of the commands.
- Select any command and click on the up and down arrows present at the right side.
- Click on Ok to save the changes.
- Close the dialog box.
How to choose icons for the toolbar commands?
Toolbars use icons in the place of words to indicate the commands. To select an icon for a command follows these steps:
- Select any command.
- Click on the modify option.
- Select the change icon option.
- This will open the change icon dialog box.
- Select any icon of your choice.
- Click on the OK option.
You can also customize the user interface by using the options available.
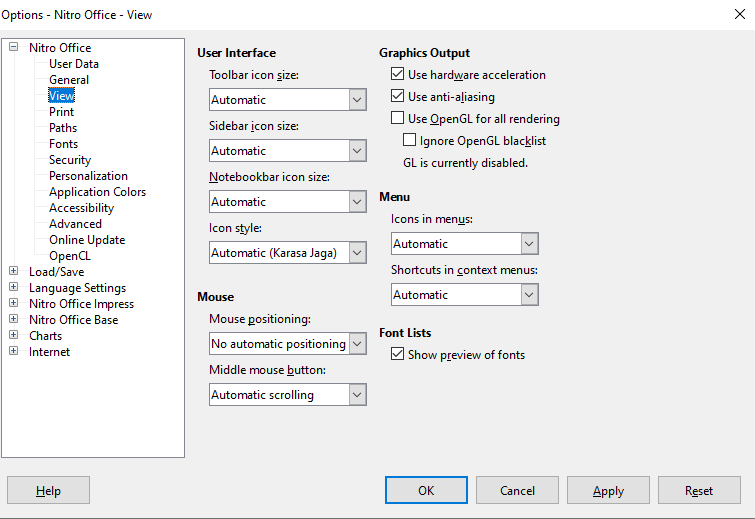
How to change the menu font?
If you want to change the menu font in Nebula Office, follow these steps:
- Click on the tools option.
- Click on options.
- Select the Nebula office option.
- Click on the view option.
- Select the option of use system font for the user interface.
- Click on Ok.
How to change the menu content?
- Click on the view option.
- Click on the toolbars.
- Select the customize option.
- This will open the Customize dialog box.
- Keep the menu page open.
- From the save-in drop-down list, choose whether you want to save this menu for the Impress or you want to keep it for a selected presentation.
- Go to the section Nebula Office Express menus.
- From the drop-down list, select the menu that you want to customize.
- Click on the menu or modify buttons.
- You can also add commands by clicking on the add option.
- Click on Ok to save the changes.
- Close the dialog box.
These are some ways by which you can customize the tools option.