You can do a lot using Nebula Office. If you have some documents to handle, edit, or work with, I would suggest the Nebula Office which can make your task way easier. If you want to know how Nebula Office can help you handle important documents.
Documents in Nebula Office
With Nebula Office, you can create your own new documents, and you can open the existing ones. You can edit any document you open using Nebula Office, which is an easy task here. It is because all the features and options are quite easy to use and user friendly.
In writer you can create password-protected documents. This can help you a lot while you are working with very important documents and don’t want to give open access.
File Format
Nebula Office creates and saves documents with .ODT extension, i.e. in Open Document file format. This is a standard format for documents used in other standard software.
In addition to this, even if you have an option to choose between different file formats, you should always choose .ODT format, because the first reason is standard, and second is it reduces the occurrence of any errors while accessing or editing them.
How to save file?
If you have made a documents file using Nebula Office, but want to save it as a Microsoft file, here is the guide for you. Keep on reading to know the exact, easy steps.
.ODT files can be easily converted to Microsoft files, where you can edit and modify these files. To create.ODT files using Nebula Office and save it as .DOC or .DOCX file, follow these easy steps:
- In the first step, save the documents in the standard Nebula Office format, i.e. .ODT format.
This will let you have the documents in this software so that you can reuse it, or get it back whenever required. This is because if you directly save it in the Word format, it may face some issues and may get corrupt. In this way, you may lose your important information. So it is better to first save it as .ODT format in Nebula Office.
- Secondly, if you do not save the document first in the Word compatible format, it might happen that the modification or the edits you have made will only appear in the Office Word, and they may get lost in the software you created the document in. So, when you are done with creating your documents, be safe by first saving the file in the .ODT format.
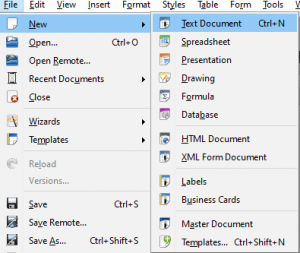
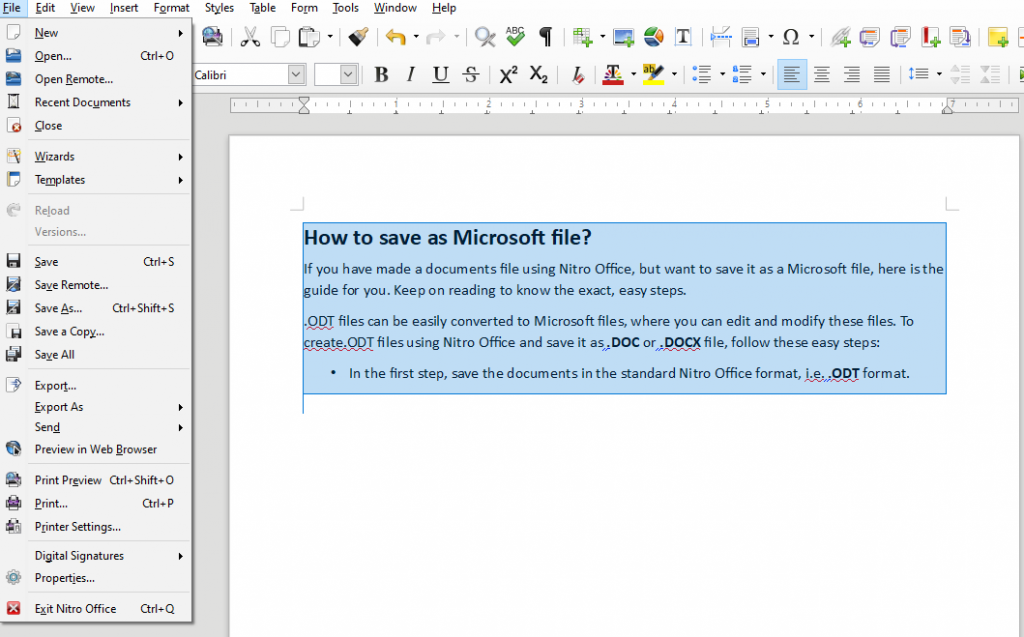
- In the menus bar, click on the ‘File’ button. A drop-down menu will open up. Look for the Save As button. Once you find it, click on the same.
- When you will click on the Save As button in the File drop-down menu, a ‘Save As’ dialog box will appear. It will show the directory in which you want to save the file. Chose the path for the file, i.e. the location or the folder where you want to save the document file.
- At the bottom of the dialog box, you will see two bars. One will ask for the name of the file. Type in the name, you want the document to save with.
- Right below the title bar, you will see the format bar. Click on the arrow at the extreme right of the bar. It will show you all the possible formats, in which you can save the file. Here, we want to save .ODT file on the word format, i.e. .DOC or .DOCX. Choose the Word format, you want to save it with. Check the file name again, it will have a different extension now!
- In the end, now click on the ‘Save’ button.
Hence, we have made a document in the Word format, without using Office Word!
Now after this step, all the changes you make to this document will appear in the new document. If you want to have .ODT format again, you can easily get that by simply opening the document again in the Nebula Office.
You can also set the Writer to save the files by default in the Word format. You can do this in the Tools menu by clicking on the Options button, and then Load/Save option. Then select the Text Document under the default section in the dialog box.
Read more articles