Nebula Office comprises of various features that will help you work on presentations, spreadsheets, documents and so on. However, as you start work on, these additions of charts, tables, and media form an integral part of the process. They help in appropriate input and representation of data that enhances the quality of work.
To learn more about it in Impress read below. Impress is an alternative to Powerpoint.
Add Pictures
You will come across a Content box that will contain the required tables, charts, and other media. There are various ways and steps as to how you can work with them efficiently. The steps are easy and convenient to follow. Have a look.
Pictures form an important part of a presentation. They represent the required objective or idea facilitating reach to the viewers in an attractive manner.
The steps to add pictures are as follows-
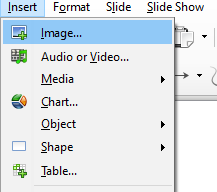
- First, you need to click Insert followed by Image on the Menu bar. After that, you can choose either from File or Scan.
- Or, once you have put in a new slide, simply click the Insert Image icon on the new slide and choose the file from the Insert Image dialog box you find.
- Next, you need to shift the picture to the place you wish to.
- Automatic resizing is available in Nebula Office to fill the area of the context box. This resizing facilitates the easy and smooth addition of pictures.
Add Tables
Tables help in the systematic and organized representation of data. You can use them for carrying out effective comparisons as well. However, one needs to be aware of the steps to add a table. Take a quick look to learn more.
- Start by clicking on Insert.
- Then, click on Table which is available on the Menu bar. The Table icon is also available on the Standard Toolbar.
- If you find an existing table on a slide, simply click on the Table icon on the toolbar.
- Choose View, Toolbars, and Table on the Menu bar. The table icon will be visible. It is visible also when you choose a table.
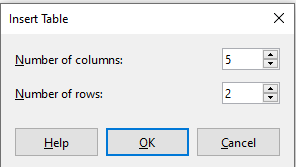
- A dialog box will open. Choose the number of rows and columns from that box. Dragging the cursor is another option available for the setting of rows and columns.
- One will be able to spot a small triangle on the right side of the Table icon.
- Design Style is important for the creation of tables. These options are available in the Table Design deck in the Properties section of the Sidebar.
- The table style is the final touch to your table.
Add Charts
Charts are the best way for a graphical representation of data. They form an integral part of the presentation or any comparison. Learn about adding charts right here.
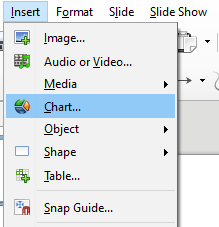
- Click on Insert followed by Chart on the Menu bar.
- After you have inserted a new slide you need to click on the Insert Chart icon.
- A default chart will be available along with the Chart dialog box.
Add Media
Audio or video is another important part of any document. They give an extra edge to the file and help in enhancing the overall presentation of the document. They serve as a great support to the overall output and help in elevating the quality of work.
The steps to add media files to a presentation are as follows-
- To start off with the process choose Insert followed by Audio or Video on the Menu Bar.
- Then, you need to insert a new slide.
- After you have done that, click on the Insert Audio or Video icon.
- At the bottom of the screen, you will find a media player opening. The preview option is also available for the media.
- When you have inserted the audio, you will come across a contents box that shall contain a loudspeaker image.
Conclusion
The addition of all these elements to your document will help you to accentuate the quality. It is important to realize that people look for attractive and pleasing presentations that will cater to a valid purpose and offer a memorable representation at the same time. This can be achieved successfully with such tables, charts, and media files.
Nebula Office facilitates the overall making of a presentation easier by offering easy steps and features. The software is readily available and helps in easing out the work efficiently. The steps need to be followed properly and you will find the desired results rightly.