No one will be much surprised, but you can also open the images on Nebula Media Player. Yes, it’s right, the users can drag any JPEG images on Nebula Media Player and also can see how it is opening within the app. You can try it yourself and see how nice the image is being loaded and opened on the Nebula Media Player.
Further it another good thing to know that the features are not limited to a single image only. You can easily drag and drop multiple images, and the application will work flawlessly and display all the images as a slideshow. One more advanced feature is there for each image. Every single image will have 10 seconds of screen time. Hence, like this, the other images will come after the first one.
When all the images will reach the end, it is all up to you how you have done the settings of the loop or do not loop. The images will be displayed similarly to the music playlist but in the pictures format.
How can the users use this pictures feature?
The method of Drag and Drop is one of the best ways to use in Nebula Media Player. The users can drag one single picture or multiple photos into Nebula Media player’s interface. They can also add it to the playlist by using the command [CTR +L] window.
The user should note one thing that currently the full folder drag and drop option is not available in Nebula Media Player because the folder may have multiple photos in it that you can not upload in the application.
You will then have to select the images manually which are stored in the folder and simply drag and drop the same into the Nebula player’s playlist. The selection process means you need to select the JPEG images individually.
What kind of images can the playlist have?
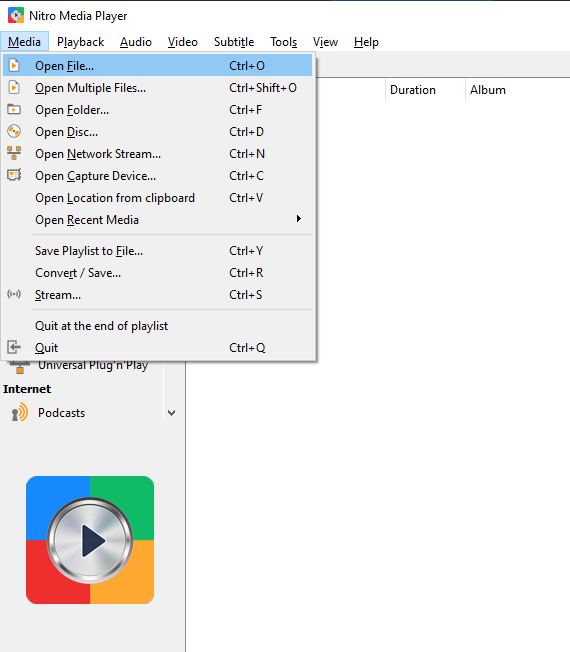
The playlist of Nebula Media Player can have .jpg files format instead of the others. Also, you can use the command Media>Open File if you want to open the pictures stored inside your computer.
Use the option Browse and open the location of the picture on your computer you want to add to the playlist. You can use this option after you hit the option- Media>Open File. After this, you can browse the picture from the dropdown, which is available on the right side, instead of the available media files (*.3g2, *.3gp), select the option which has the icon (*).
After doing this, all the picture (JPEG files) will start displaying them in the playlist. You can now choose them and open just like you open the other media or files.
Changing the limit of 10-second /picture Limit
When you have opened a photo, it will be displayed on the playlist or screen for a maximum of 10 seconds. If you have selected multiple photos, then each of them will get the 10 seconds to be displayed on the playlist, and the next photo will come after the previous one on the screen. It will look like a slideshow to you. You will have the option over there like- Pause, Play, Next, Previous etc., which will help you out while navigating the picture.
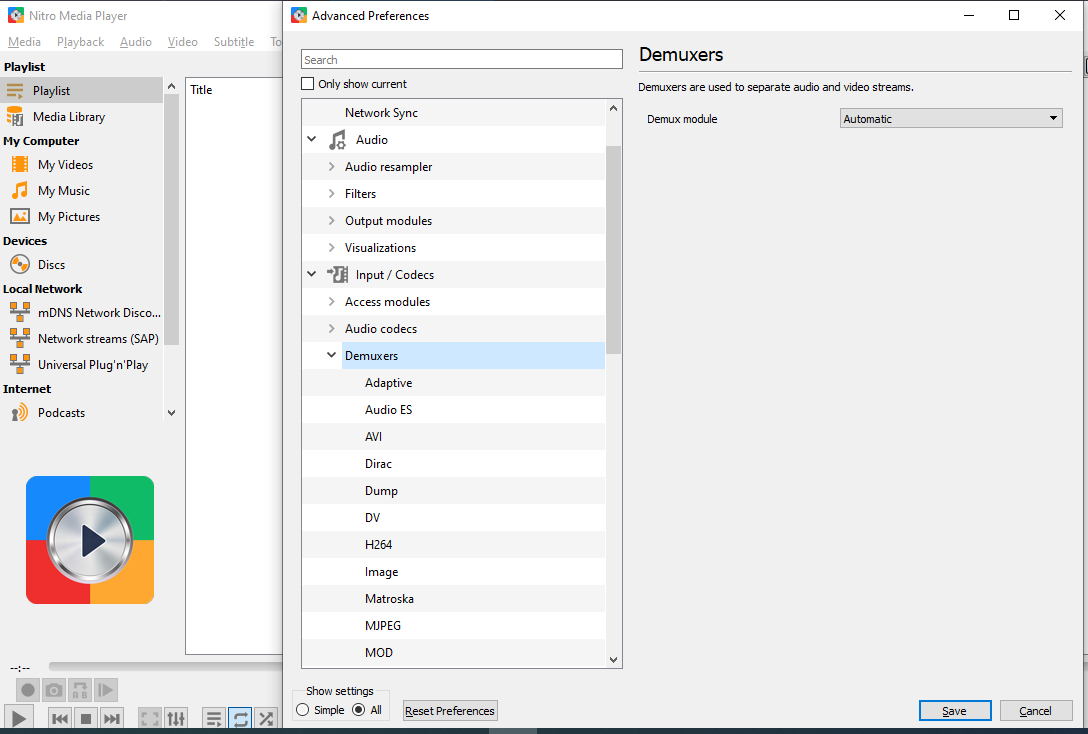
To change this limit of 10 seconds for each photo to 3 second or 15-20 seconds, you will have to do this using the advanced setting of Nebula Media Player.
To this setting, here are the steps, which you need to follow-
- Go to the option Tool >Preferences
- Now, click on All to see the Advanced Preferences options
- Click on Input/Codecs>Demuxers> Image
- Next, change the time from 10 seconds to something else (for example 3 seconds or so)
- Hit Save and you are done.
Now, the entire pictures in your Nebula Media Player will be displayed as slideshow in the way you have defined the timeline.
What more things you can do after opening the pictures?
After you have opened the picture in the Nebula Media Player, you can perform so many things like you used to do with the videos. If you assume one image as a video, you can do so many things with it. You can modify the frame along with all customization and options, which are available in the Nebula Media Player.
It also indicates that you can apply the effects like videos, for example- Rotating it, Adjusting it, increase or decrease the contrast, adjust the level of brightness and overlay the text, logos etc.