Macros
A Macro is a sequence of pre-configured commands (mainly effects) in a set order that can be applied automatically to projects or audio files. Any built-in, LADSPA, LV2, Nyquist, VST or Audio Unit (Mac) effect shown in the Effect Menu can be added to a Macro. You can also add plug-ins in any format that are shown in the Generate or Analyze Menus (including Vamp analysis effects), the built-in Find Clipping analyzer and a number of export commands.
Macros follow a fixed sequence of instructions. If you want more flexibility than that, you may want to look at Python Scripting which uses the same commands and the Python language.
Contents
- What are the uses for Macros
- How to access Macros
- Manage Macros
- Macros Palette dialog
- Macro Command Parameters
- Sharing a Macro
- Where Macros are stored]
- Macros Examples
What are the uses for Macros
The three main uses of Macros are:
- Batch processing: where many audio files are processed unattended with one or more effects then exported to a new file.
- Effects automation: where the selected audio in the track or tracks in the current project is subjected to the same prescribed sequence of effects, and optionally, a file exported from the entire audio. Note that Macros can contain Select commands to make their own selections as the Macro runs.
- Effect presets: where selected effects and their settings are stored for quick re-use.
How to access Macros
Macros are available from the Tools Menu:
- to manage Macros, to create, edit and test them
- for a toolbox of Macros
- to apply one named Macro
There are some examples of Macros and tips on using them.
Manage Macros
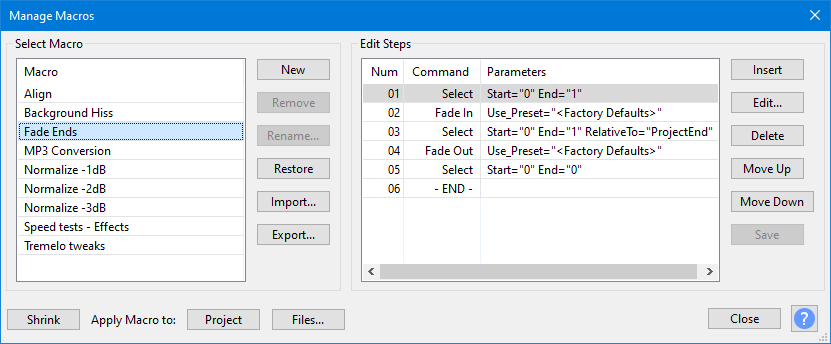
Use if you need to create a new Macro or to edit an existing Macro.
Macros Palette dialog
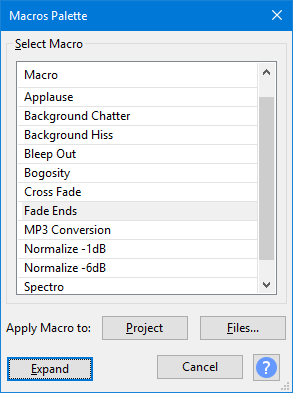
Use the button to show a reduced Macros Palette dialog with a simple list of the existing Macros.
This dialog is also available directly via
Using the button on this reduced dialog will return you to the full Manage Macros dialog.
Apply Macro to
Both the Macros dialog and the Macro Palette dialog have "Apply Macro to" Buttons:
- applies the selected Macro to the current project.
- applies the selected Macro to selected external audio files that are in a single directory.
For more details see the Apply Macro page.
Macro Command Parameters
Commands that call Effects, Generators, Analyzers or Tools, use the same familiar graphical interface (GUI) as appears when they are used from the normal top level menus.
Many of the other commands provide a simple GUI comprised of checkboxes and text entry boxes. Typical examples can be seen in the Scriptables I and Scriptables II menus.
| It is strongly recommended that you set parameters for the commands that you use in a Macro.
Otherwise Audacity will use the last-used parameter setting(s) when you ran the effect(s) manually. Also note carefully that settings used in Macros will not affect or change the last-used parameter settings for any effect when next run manually. Basically to paraphrase: "What happens in Macros stays in Macros". |
Please see Manage Macros for more details.
Sharing a Macro
You can export a Macro as a TXT file using the button in Macros Manager and send it to another user, or copy it to another computer for use there
You can import another user's Macro, or a copied macro of your own, into your Macros folder by using the button in the Macros Manager.
Where Macros are stored
Each Macro is automatically saved as a separate text file with TXT extension in the "Macros" folder in Audacity's folder for application data:
- Windows: Users\<username>\AppData\Roaming\audacity\Macros
- Mac: ~/Library/Application Support/audacity/Macros
- Linux: ~/.audacity-data/Macros
| In order to see the Macros folder on Windows, macOS or GNU/Linux, you must show hidden files and folders or type the folder location into your file manager's address bar.
|
Macros Examples
See the Macros Examples page for examples of using Macros

